FlightPi
Table of Contents
Please consider leaving a small gesture of your appreciation.

As an Air Traffic Controller, people often point at planes in the sky and ask me what it is and where it’s going - most of the time I make up some complete nonsense, saying it convincingly enough that they believe me. However, curiosity got the better of me and I started to imagine a project that could hang on my wall and instantly answer such questions - FlightPi was born! For some time I’ve been using a Raspberry Pi to feed data into FlightRadar24 in exchange for a free subscription, so since this information was already passing through my network, I just had to come up with a way to display it that doesn’t look completely rubbish! Here’s a video that gives a brief overview of the display in action, and talks a little about what makes it work.
Data Collection #
First up, you’re going to need something to receive the Automatic Dependent Surveillance - Broadcast (or ADS-B to most people) signals that planes transmit. Without mounting a radar to the roof of your house, this is the best way of determining where planes are, and this system has the advantage of being receivable with most software-defined radios. There are many guides online about how to set this up for yourself, so I won’t go into details here on how to achieve this.
Display Hardware #
As I wanted something that wouldn’t look completely out of place on my wall, I started by looking for a frame I could use to contain all my hardware - I wanted to have everything on show rather than hiding pieces away, in some attempt to make this piece vaguely artistic! Conveniently, IKEA stock a 23cm square frame which has enough depth to mount all the components. I took this frame and drilled holes in the back to fit some M2 screws, which then attach to the components (with hot-glue in lieu of proper fasteners in some places!). The obvious choice for processing the data was a Raspberry Pi Zero W, as this gave me WiFi connectivity and a small form factor that wouldn’t look out of place in a frame with the other components. I’m very aware that this project could have been achieved using only Arduinos, but I’ve been trying to find more opportunities for practising my Python coding! To display some textual information on the flight, I opted for a 20x4 LCD display which connects over I2C. When buying components for this build, I wasn’t exactly sure how I wanted to display the height/direction, so opted for some Adafruit NeoPixels in both stick and ring shapes so I could experiment. As the Raspberry Pi isn’t capable of running NeoPixels due to the accuracy of timing needed, I acquired some Arduino Nanos to drive these.
Data Processing #
Conveniently, dump1090 outputs all the ADS-B messages it receives to a socket on port 30003 in the SBS message format, for which there are a number of parsers available. As I was looking to practice my Python skills, I wrote my own which limited the data structure to the information I wanted on my display, discarding the rest. I then wrote some other straight forward code to store details on the most recent flights we’ve received information on, and then determine which one to show on the display (my logic limits this to updates in the last 30 seconds, and if there’s a choice displays the lowest available aircraft) - this is then written to the LCD display and also via serial to the Arduino, which updates the NeoPixels accordingly. I’ve made all of the source code available on Github. As this is a very personalised project, I’m not anticipating accepting any changes back into the main repository, but feel free to fork and make changes for your own builds!
Build #
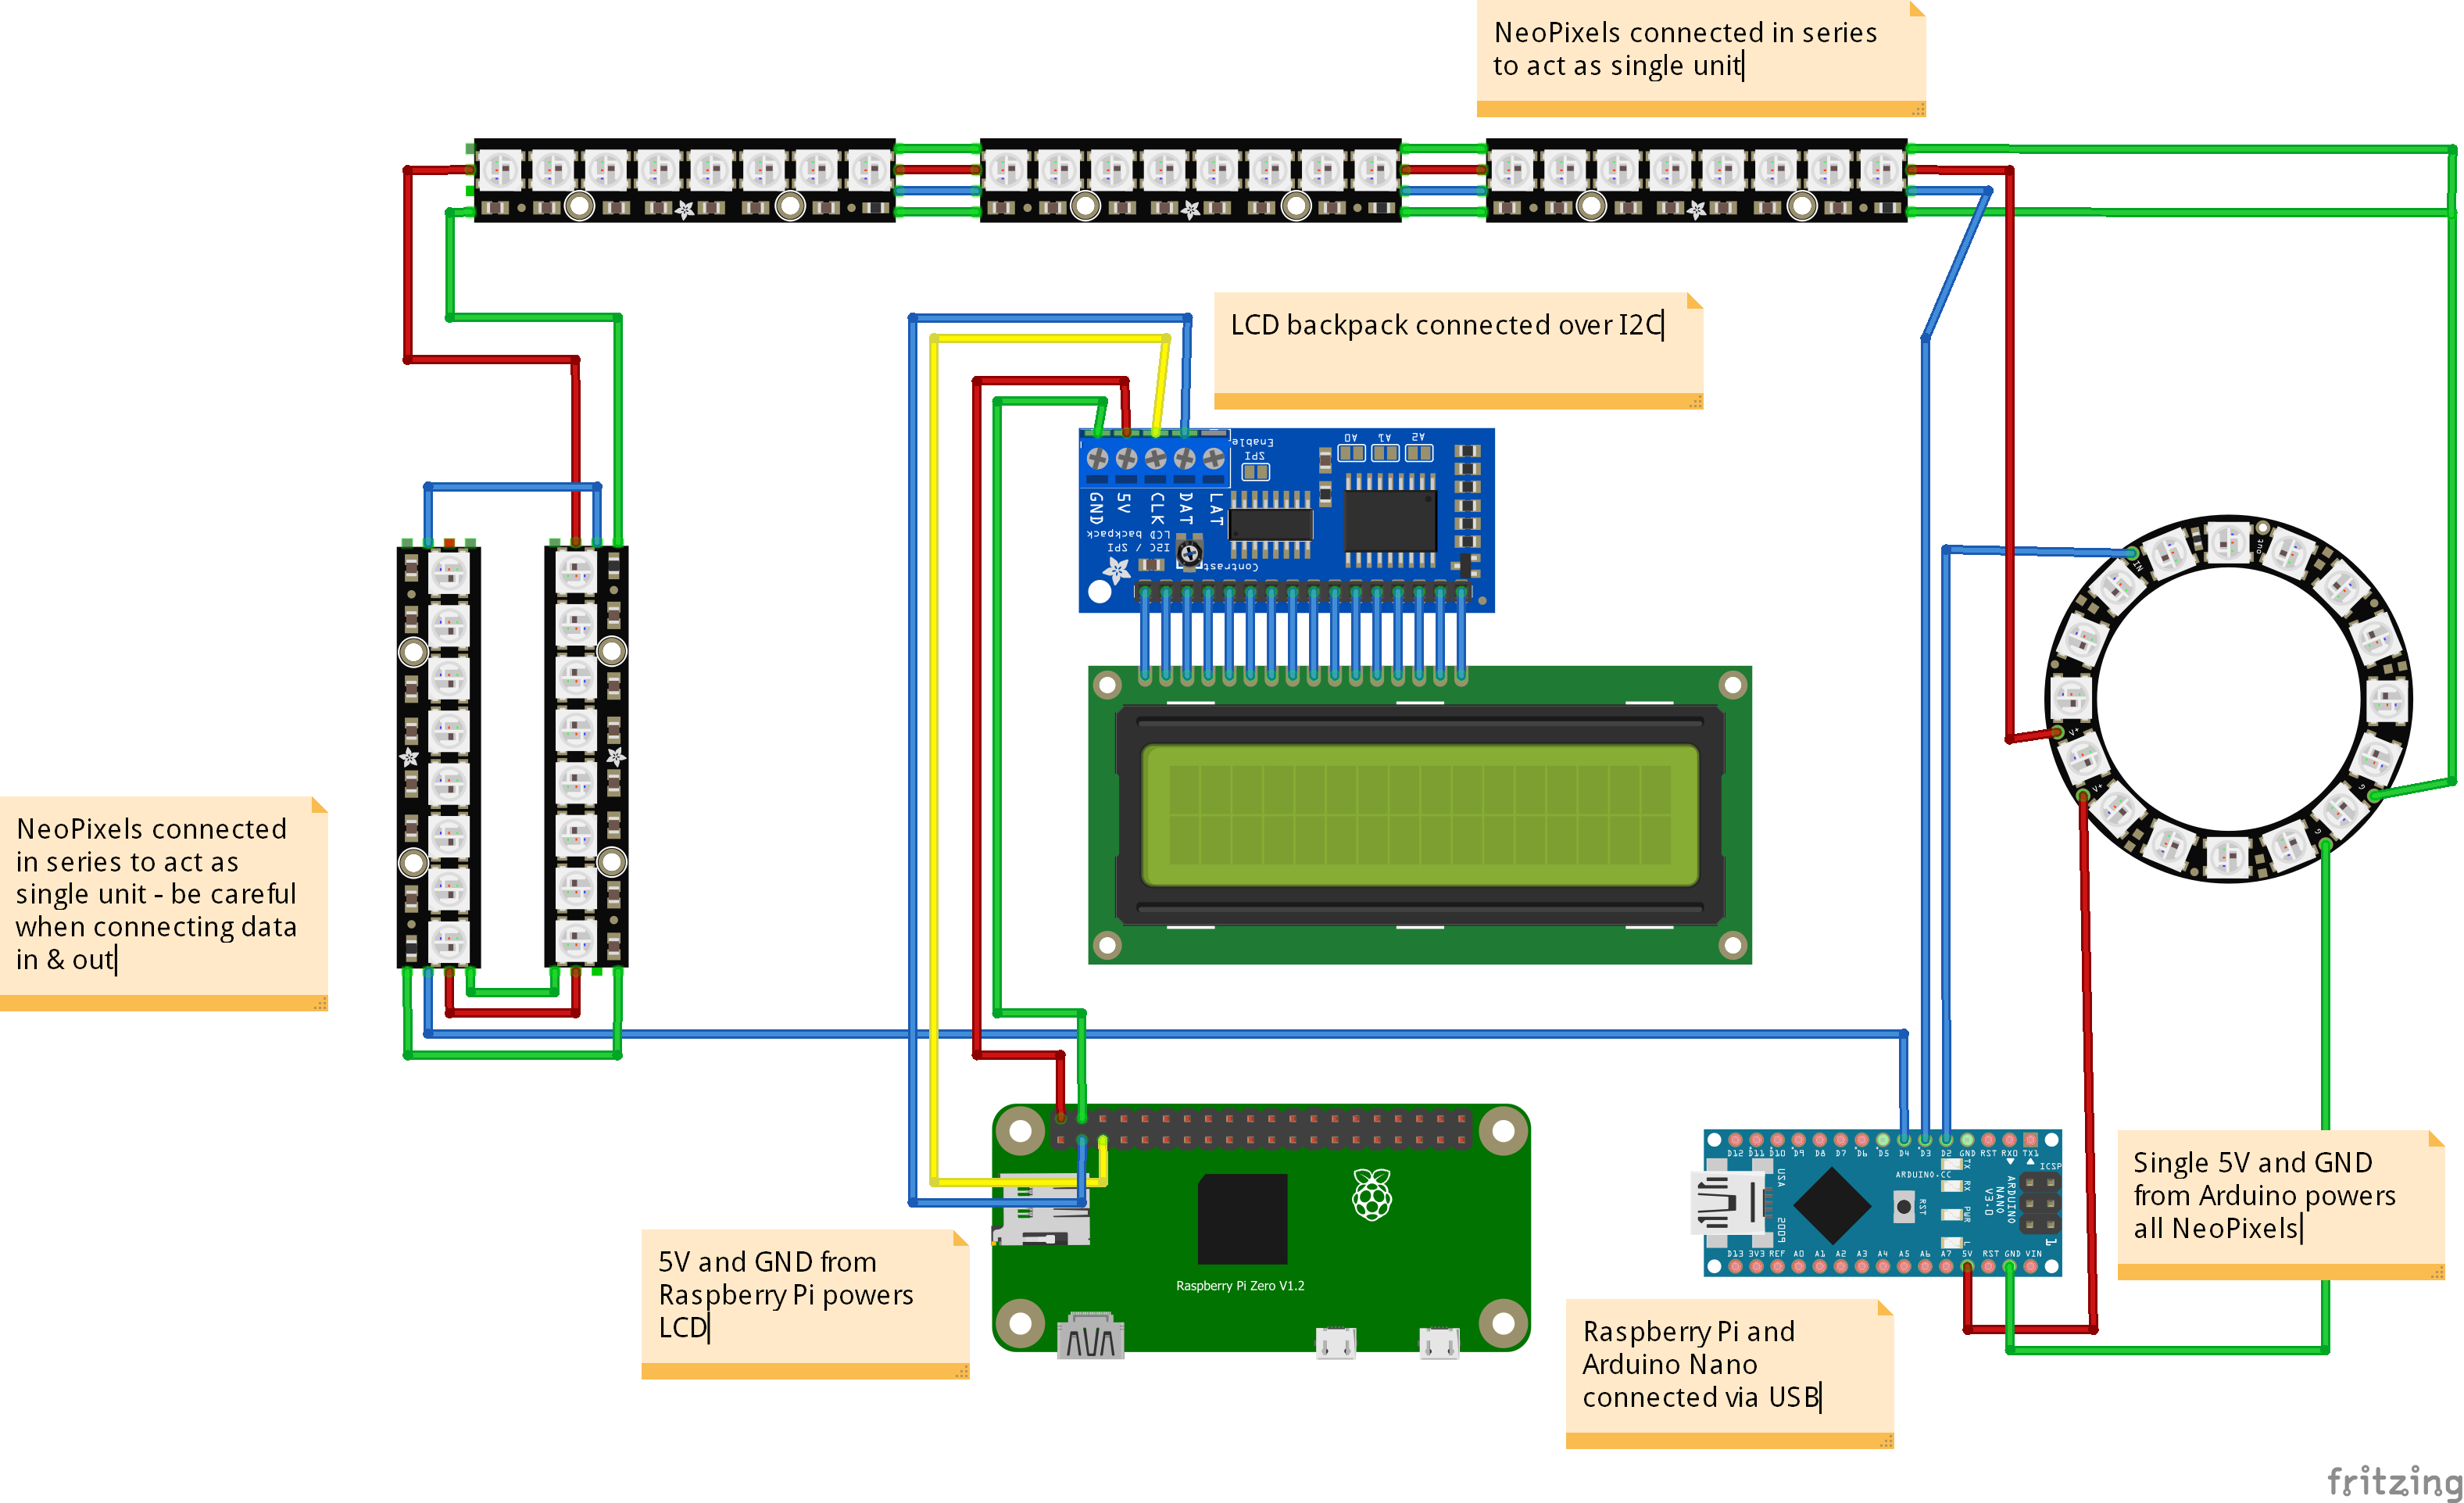
The actual wiring for this project was quite simple - see the diagram for how it was done.
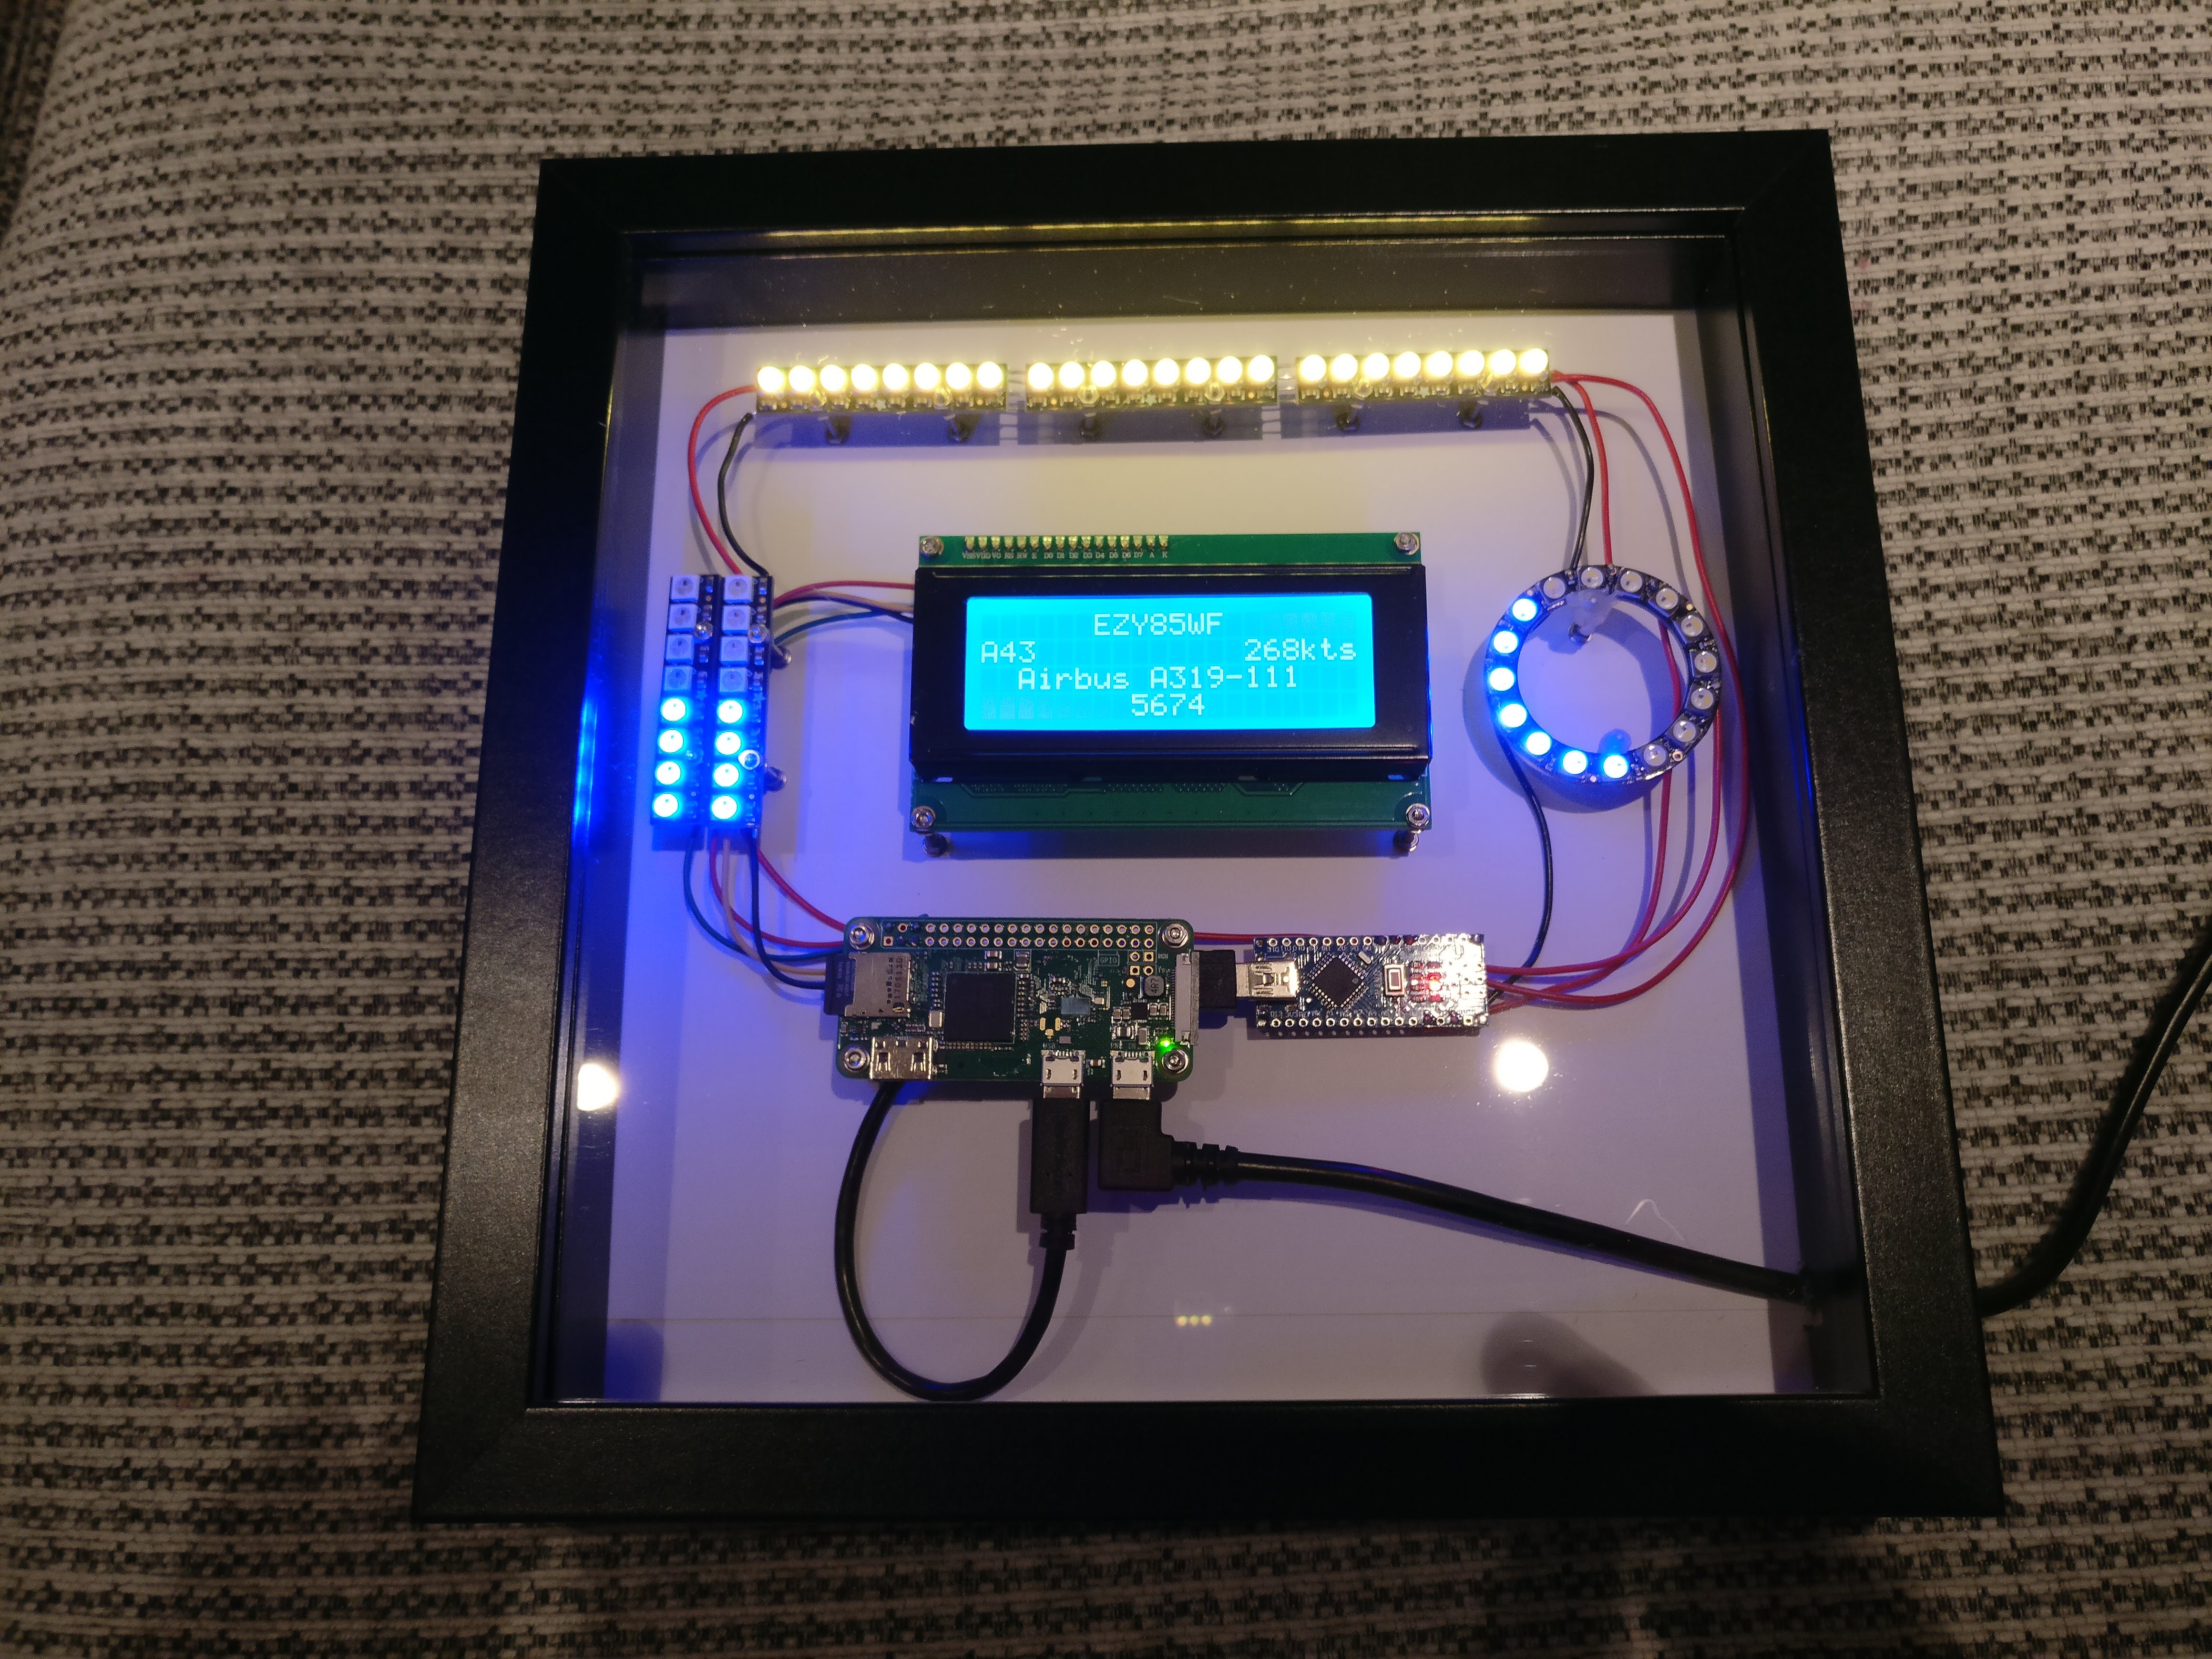
The finished piece #
You can see the project in action in the video above, but here are a couple of photos of the completed FlightPi! Apologies for the poor quality, the very bright LEDs make it a challenge to take good photos!

Questions? #
If I’ve not answered your question here, then please feel free to leave it in the comments below!
How far away does it track planes? #
My receiver is only connected to my TV aerial, which is definitely not the correct way to receive ADS-B signals! However, it can pick up aircraft a couple of miles away laterally, and pretty much unlimited vertically (I’ve tracked planes as high as 39,000ft), so it’s perfect for this use case!
Tracking planes is illegal! #
Nope. The ‘B’ in ADS-B stands for ‘Broadcast’, which implies that it is for general reception. However, I agree this isn’t a particularly good system - if you’re interested in the issues then I’d recommend watching this DEFCON talk which highlights the insecurities with ADS-B.
How long did it take to build? #
I’ve been working on this project for months, but only because I could never find the time to complete it! The build was straight forward and only took me a few hours, then a couple of days to write the code and test.
Can you make me one? #
I’d love to, but most of the fun here is in building it yourself! Some technical knowledge is required in getting the receiver working in the first place (that’s the difficult bit!), once you’ve done that you may as well build your own!
Why doesn’t it say where the plane is going? #
Unfortunately that information isn’t contained within the ADS-B standard. Sites like FlightRadar24 have an extensive database linking flight numbers and callsigns to routes, which they use to show this information. However, this information is obviously very important to their service, and not something they want to publicly share through an API for me to use!
How do you figure out what type of aircraft it is? #
Unlike the route, the aircraft type never changes! I’ve made use of the ae.roplan.es API to determine type and registration, and then cache this locally. Their database isn’t perfect, but I seem to get information on at least 80% of the flights I see.